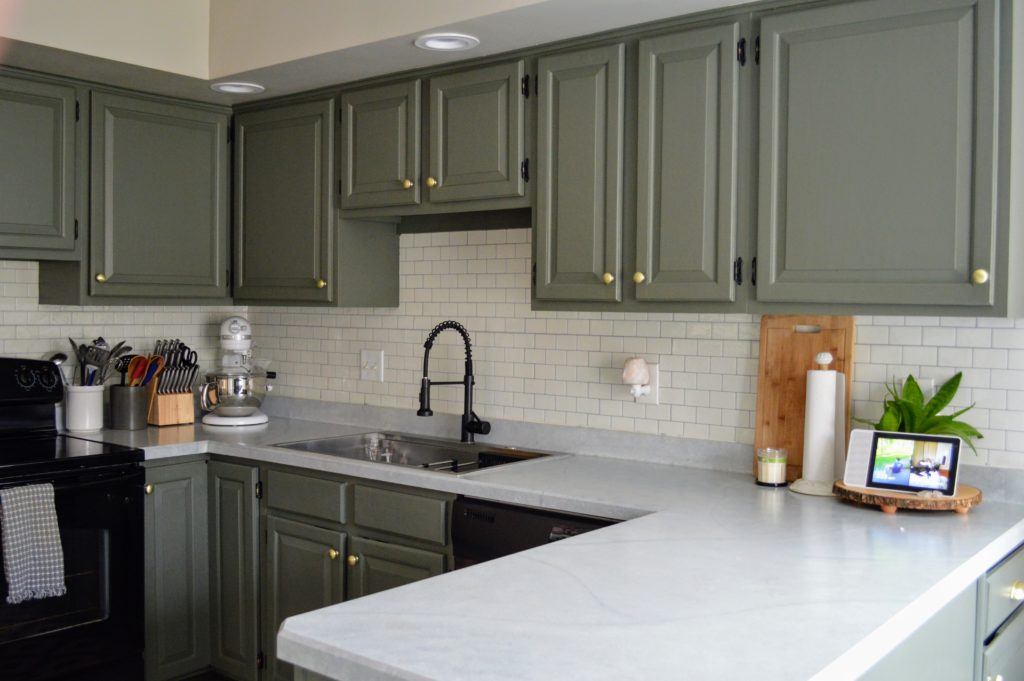
One of our 2020 House Goals was to give our kitchen a refresh. I did not anticipate that this would literally take the entire year, but I think 2020 snuck up on all of us, so here we are! Even though it took much longer than I wanted, we are so happy with the end result. I’m so excited to share a few photos today!
As a quick recap, here is what our plan was initially:
Paint the cabinets a fresh new color, install a peel and stick backsplash, update the countertop with contact paper or paint, replace the hardware, paint the walls, trim, and ceiling, replace the recessed lights, and possibly update the flooring.
And here is where we started:
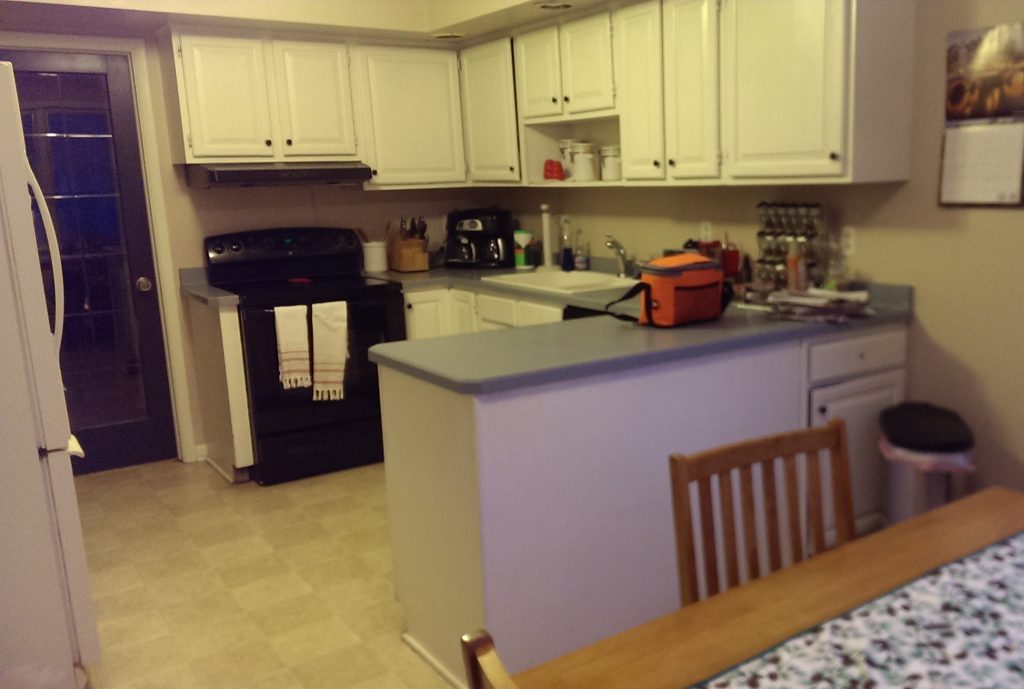
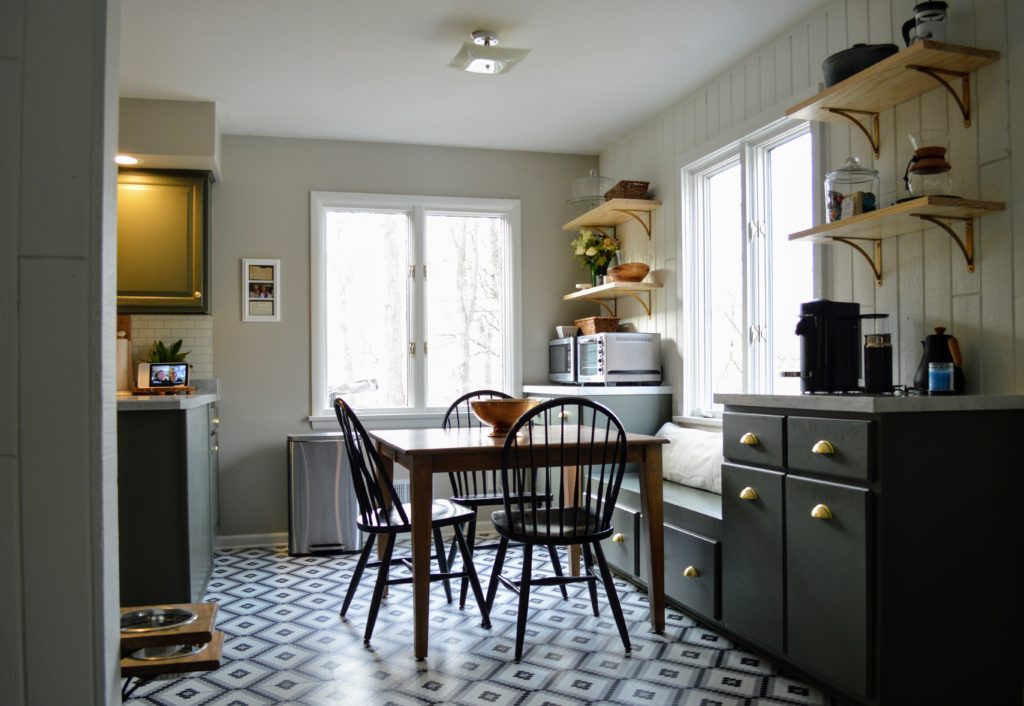
I am happy to report that we checked all of those boxes and more! When we got done with our initial list, we loved how things were coming together so much that we gave in to a bit of scope creep. We ended up also completely replacing the sink and faucet, removing the built-in hutch, and replacing it with DIY cabinets, a built-in bench, and some open shelving.
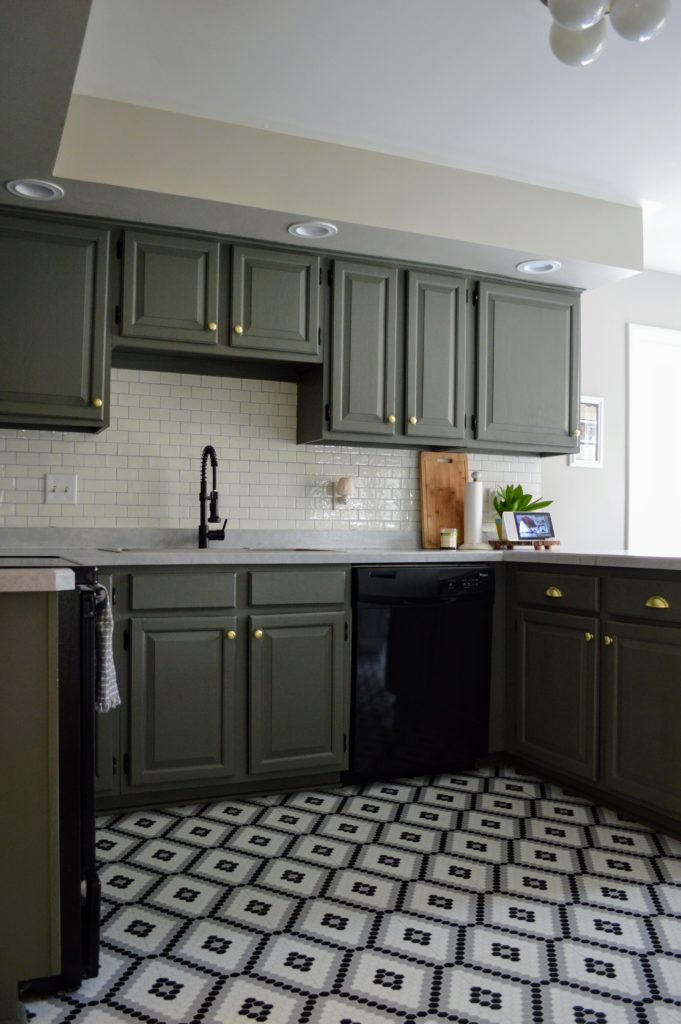
I think the new paint color on the cabinets was the most impactful change. The cabinets had been badly painted and were in dire need of some love. We used Sherwin Williams Emerald Trim Enamel in a satin finish. The less glossy finish helps hide some of the grain and imperfections in the oak cabinetry, but the enamel finish makes it durable and easy to clean.
Updating the countertops ended up being a process. We started with contact paper and loved the look and the finish, but it didn’t adhere well despite doing all of the proper prep work and installation practices. After a few weeks, we realized it just wasn’t going to work, so we pulled it all up and started fresh. We later used a different contact paper for another area and it worked beautifully, so I now think it was just a poor quality product.
The second time, we used this Giani White Diamond Countertop Paint. I’ll be honest – I’m a little “meh” at the results. It looks good enough, and definitely better than the baby blue laminate that’s underneath, but I’m not in love with it. Maybe it’s my poor artistry, but I don’t think it’s going to fool anyone to thinking it’s stone. It looks and feels very much like a painted laminate countertop. The clear protective coat was also rough and bumpy after application. I ended up lightly sanding and applying several coats of polyurethane over top.
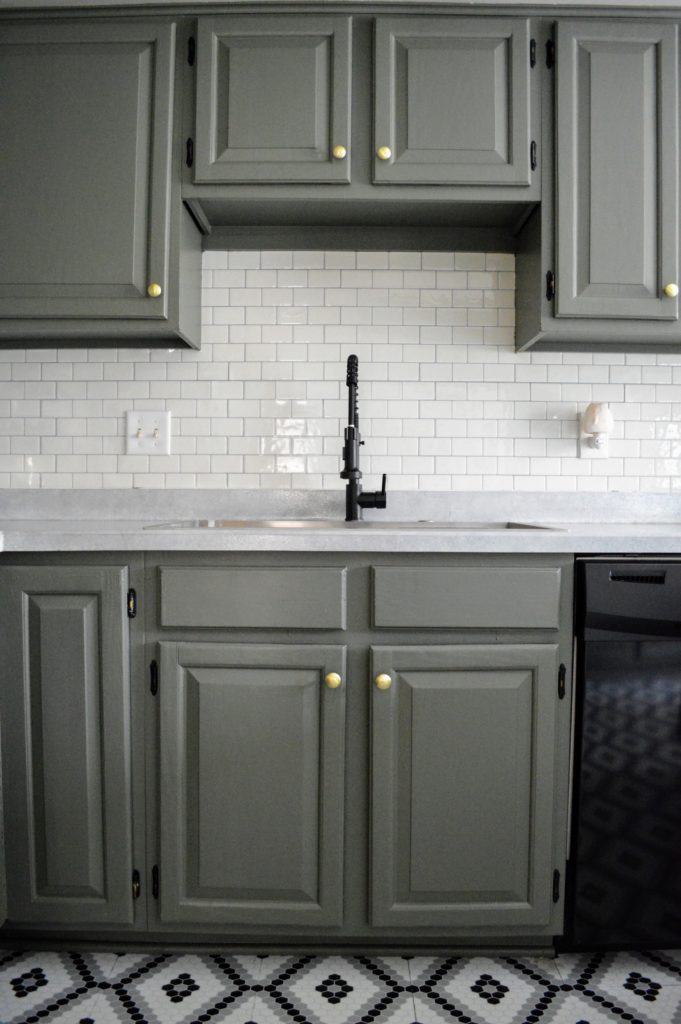
The peel and stick backsplash, and LED retrofit lights were a cinch to install and look fantastic. We used this brass cup pull for the drawers and these knobs for the doors. Polished or unlacquered brass hardware would have been our first choice but these were budget-friendly and fit the need. Updated hardware can really change the look of a room and the brass hardware with the dark green/gray paint is such a lovely combination.
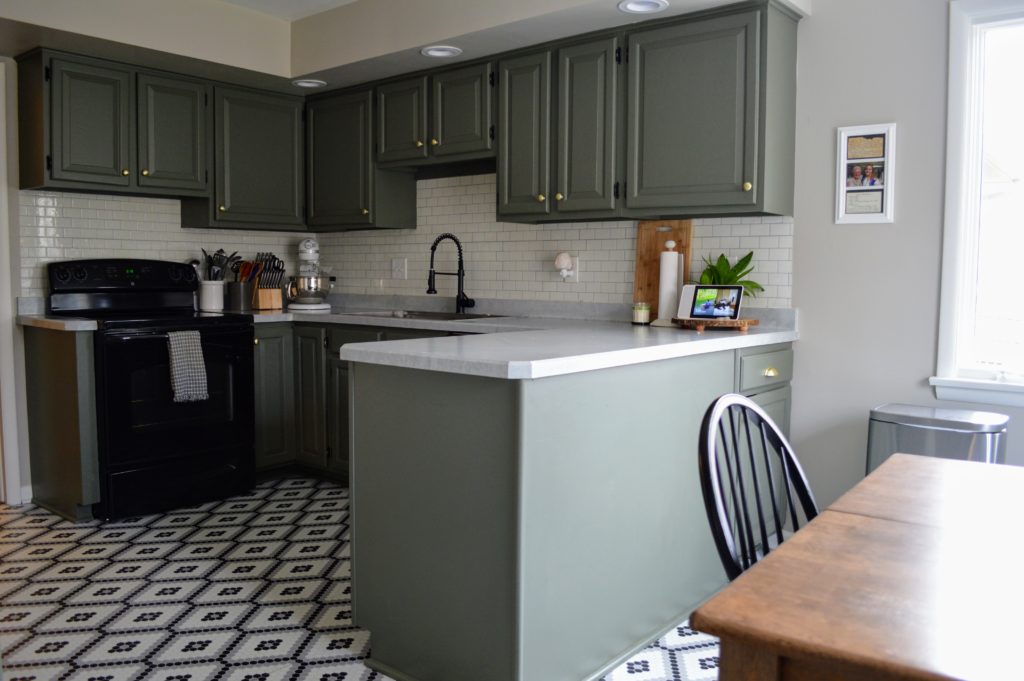
We took a risk on the floor and installed these peel and stick tiles. I was really nervous that the pattern would be too bold or busy, but I actually love it. If we were installing regular tile, I probably would have been to nervous to choose such a bold pattern, knowing it could potentially be a costly mistake to replace.
A leak in our faucet necessitated replacement and we decided to swap out the sink for a large single bowl stainless version at the same time. It was so worth the effort. The new sink is huge and easier to keep clean than the previous. The faucet has a more modern look, multiple spray settings and doesn’t require us to feed a hose manually back into the faucet if we pull it out.
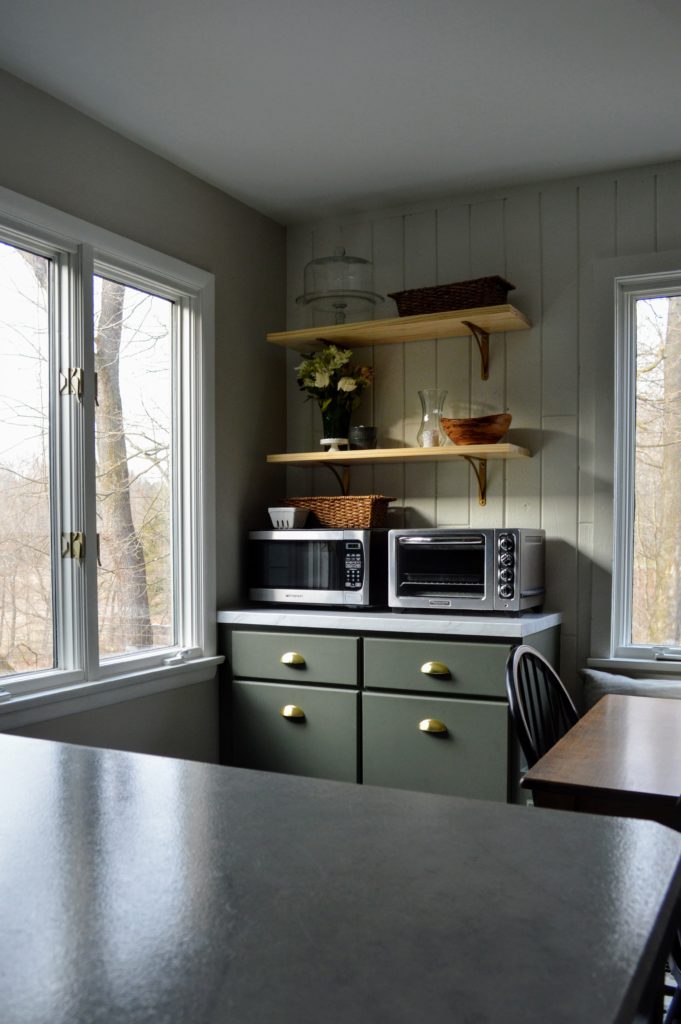
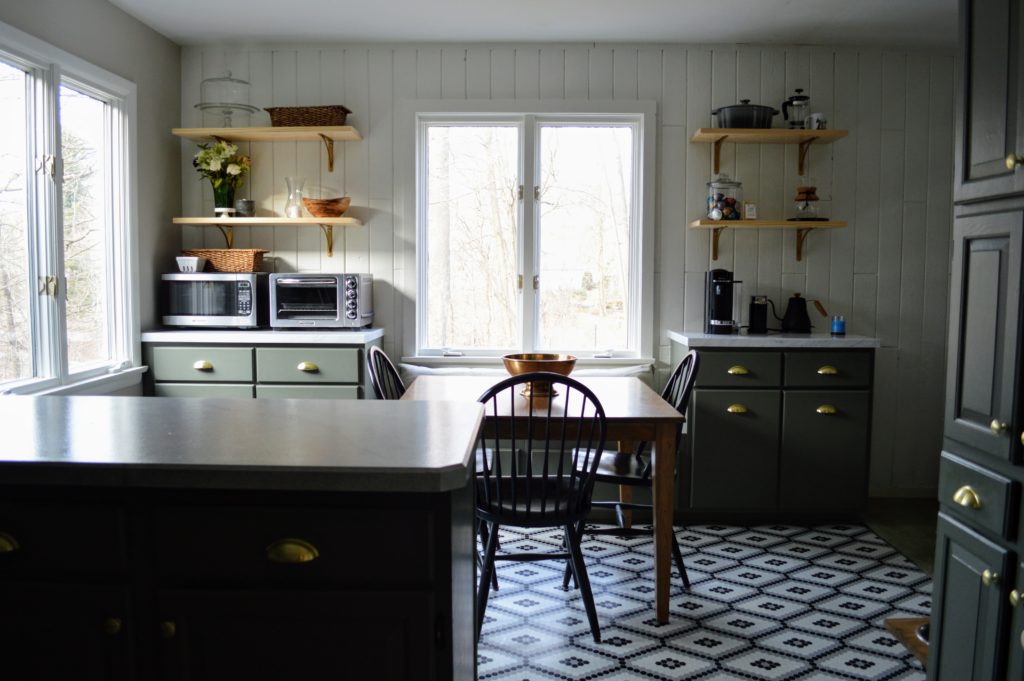
As I said before, we also gave in to some scope creep by removing the hutch and replacing it with more cabinetry. The hutch was bulky, closed off the breakfast nook, provided really awkward storage, and needed some repairs. I have wanted to tear it down since the day we moved in, and it was just as satisfying as I thought it would be to get it done! We replaced it with DIY base cabinets using Bourbon Moth Woodworking‘s YouTube tutorials. Cabinet building was so much fun, and easier than I thought it would be – his instructions were fantastic. For the countertops, we laminated together two 3/4″ pieces of MDF cut to fit the cabinets. We built the shelves using this tutorial from Yellow Brick Home.

What I loved most about this budget-friendly “Phase 1” update was knowing nothing would be permanent. It allowed us to make some decisions that were out of our comfort zone knowing that this isn’t forever. In the end, we are so, so happy with how everything came together. It is such a warm happy space for us and we are loving spending time here.
Sources:
- Cabinet Paint (Color – Sherwin Williams Thunderous)
- Wall Paint (Color – Benjamin Moore Revere Pewter)
- Ceiling Paint (Color – Sherwin Williams – Alabaster)
- Trim Paint (Color – Sherwin Williams Alabaster)
- Countertop Paint
- Peel and Stick Backsplash
- Retrofit LED Recessed Lights
- Floor Tile
- Cup Pulls
- Knobs
- Shelves – Unfinished pine stair tread
- Brackets
- Bracket Paint

[…] can read about our kitchen refresh here. It took us most of the year to complete this project but it was so worth it. We are thrilled with […]